

Update 2017: When I moved to a new classroom I reupholstered my crate stools to match my new classroom theme. They turned out great! I simply purchased new fabric, pulled off the old fabric and stapled the new fabric down. Since I teach upper elementary now, I noticed that my students were breaking my old crate stools because they were too big for them! We’ve transformed them into floor cushions for flexible seating. Sometimes they remove the cushion, flip over the crate and create a workstation for their Chromebooks.

Original post from August 19, 2013:
I’ve been having such a blast getting my classroom ready. I feel like it is starting to take shape and isn’t just an explosion of bins from my attic and bags from Target and Big Lots. One of the blessings and curses of having a small class is that I can get away with doing some of the really adorable and fun things I’ve seen on Pinterest because I only need six of everything! It’s a blessing because it’s manageable to make or find, it’s a curse because it’s getting expensive! But in my usual “glass half full” mentality, I am embracing my six little loveys and I’ve been having a great time putting together our new home. So get ready to hear me start many blog posts with “Since I only have 6 kids…” for the next 10 months!
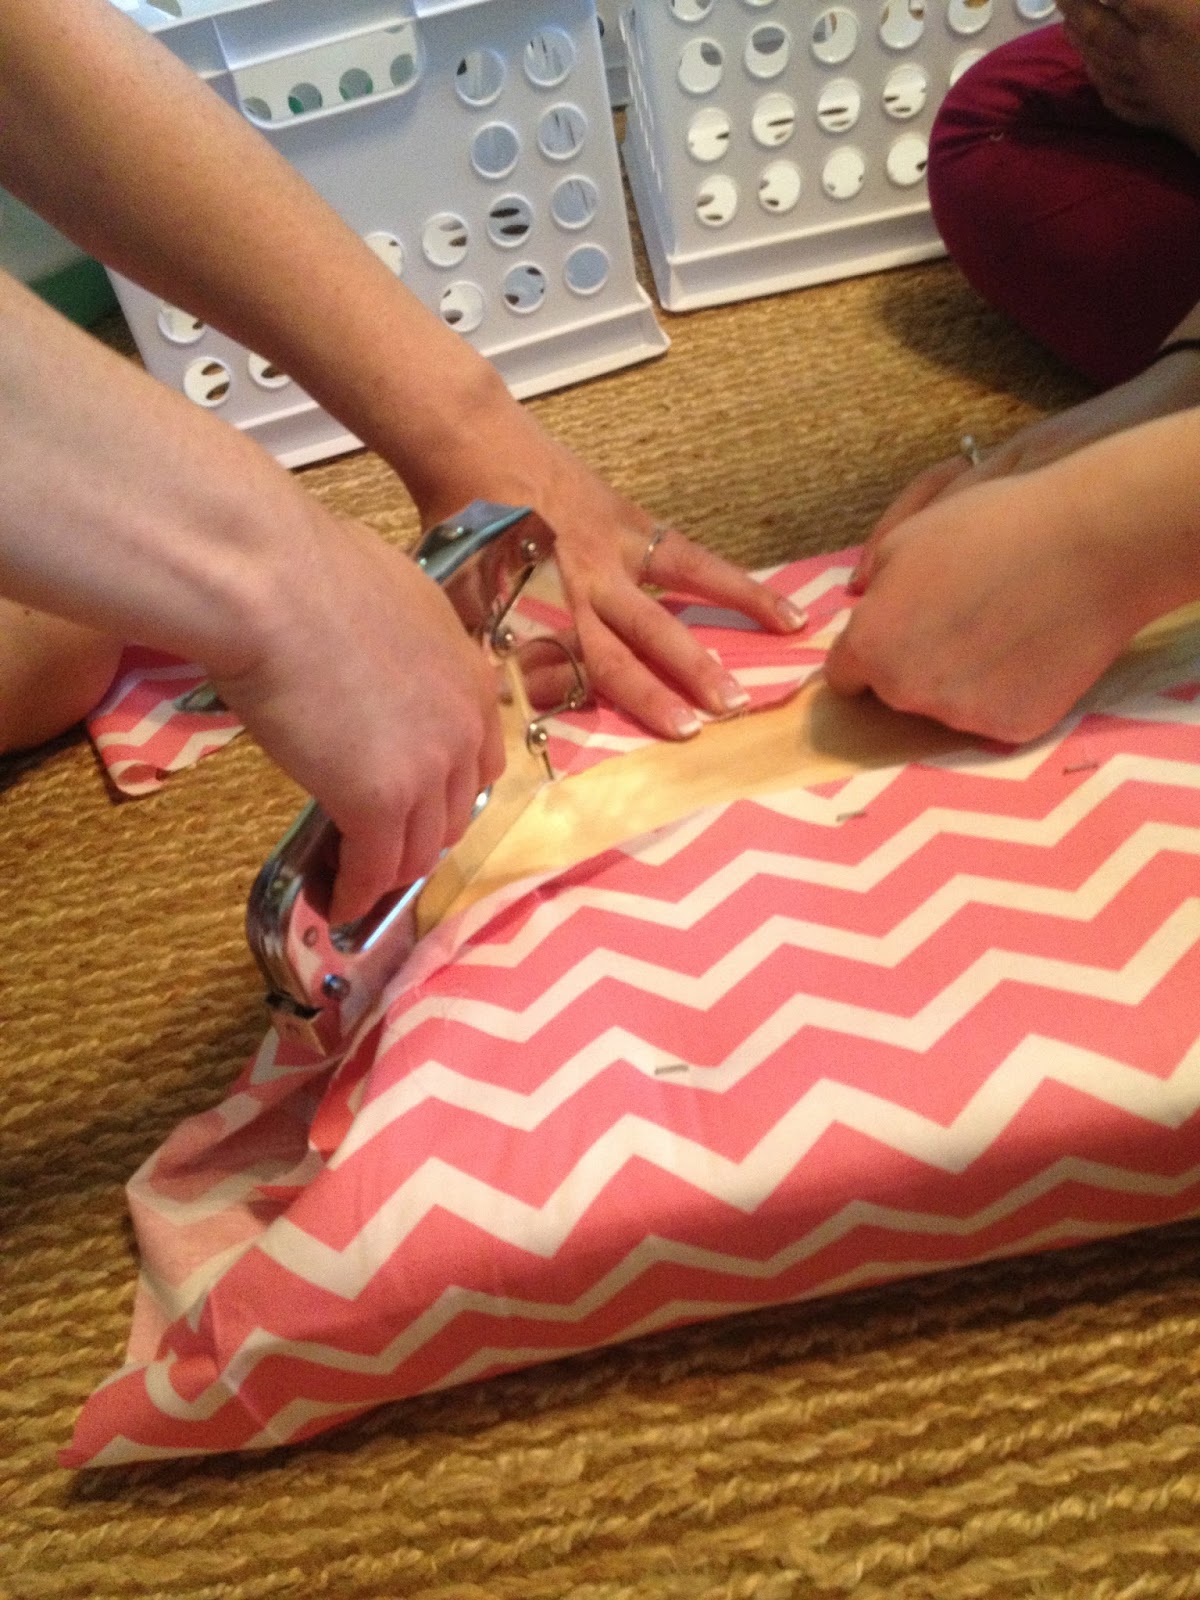
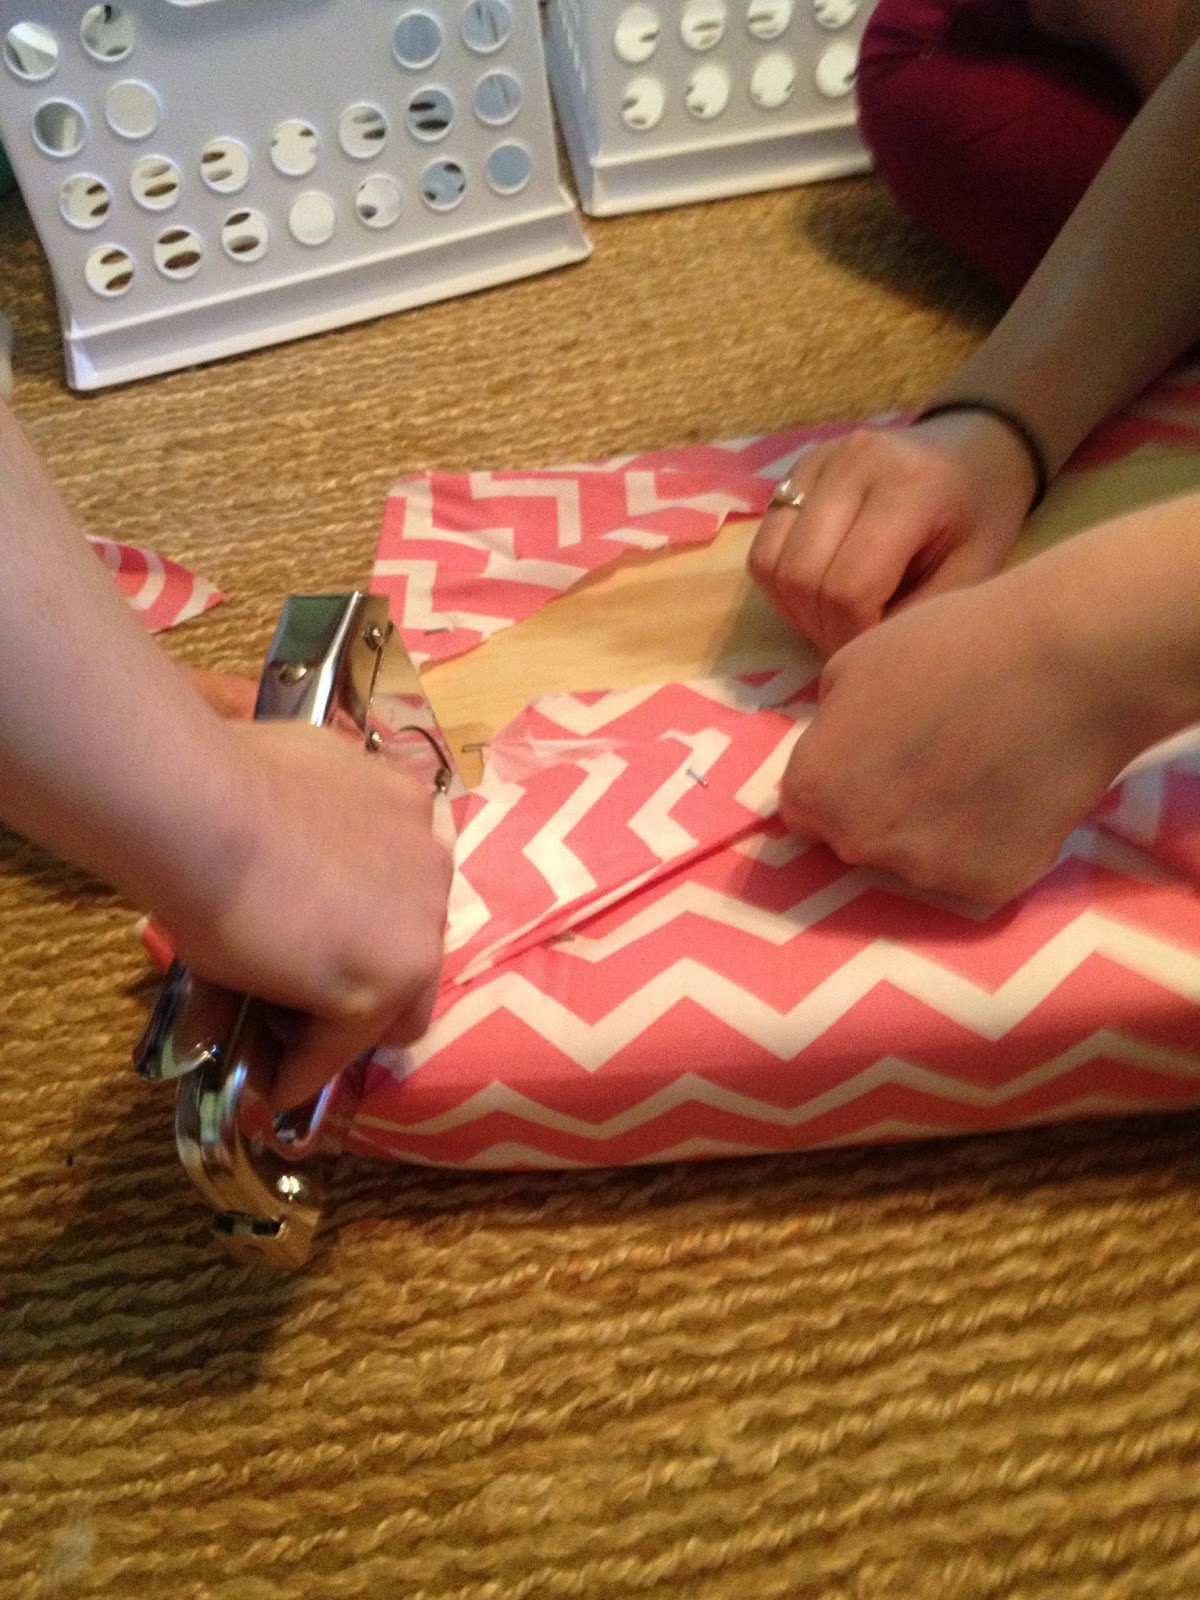
Since I only have 6 kids…I was able to make enough of these awesome crate stools that I’ve been swooning over on Pinterest for over a year. My friend Jenn made them last year for her class and I was so jealous! I couldn’t wait to find the time and reason to make them. When I was a consultant teacher, my students didn’t spend any time in my classroom doing morning meeting/circle time. Now that I’m back down with my kindergarten-first grade friends, I have a need for these lovely little stools! I contemplated buying 6 bean bag chairs but those are hard to store. I also considered getting 6 of those little back rest pillows, but then I worried about lice and not being able to wash the pillows. Teacher problems. Now I am so happy I splurged and made these because they are so stinkin’ cute!

Here’s how it went…
You will need:
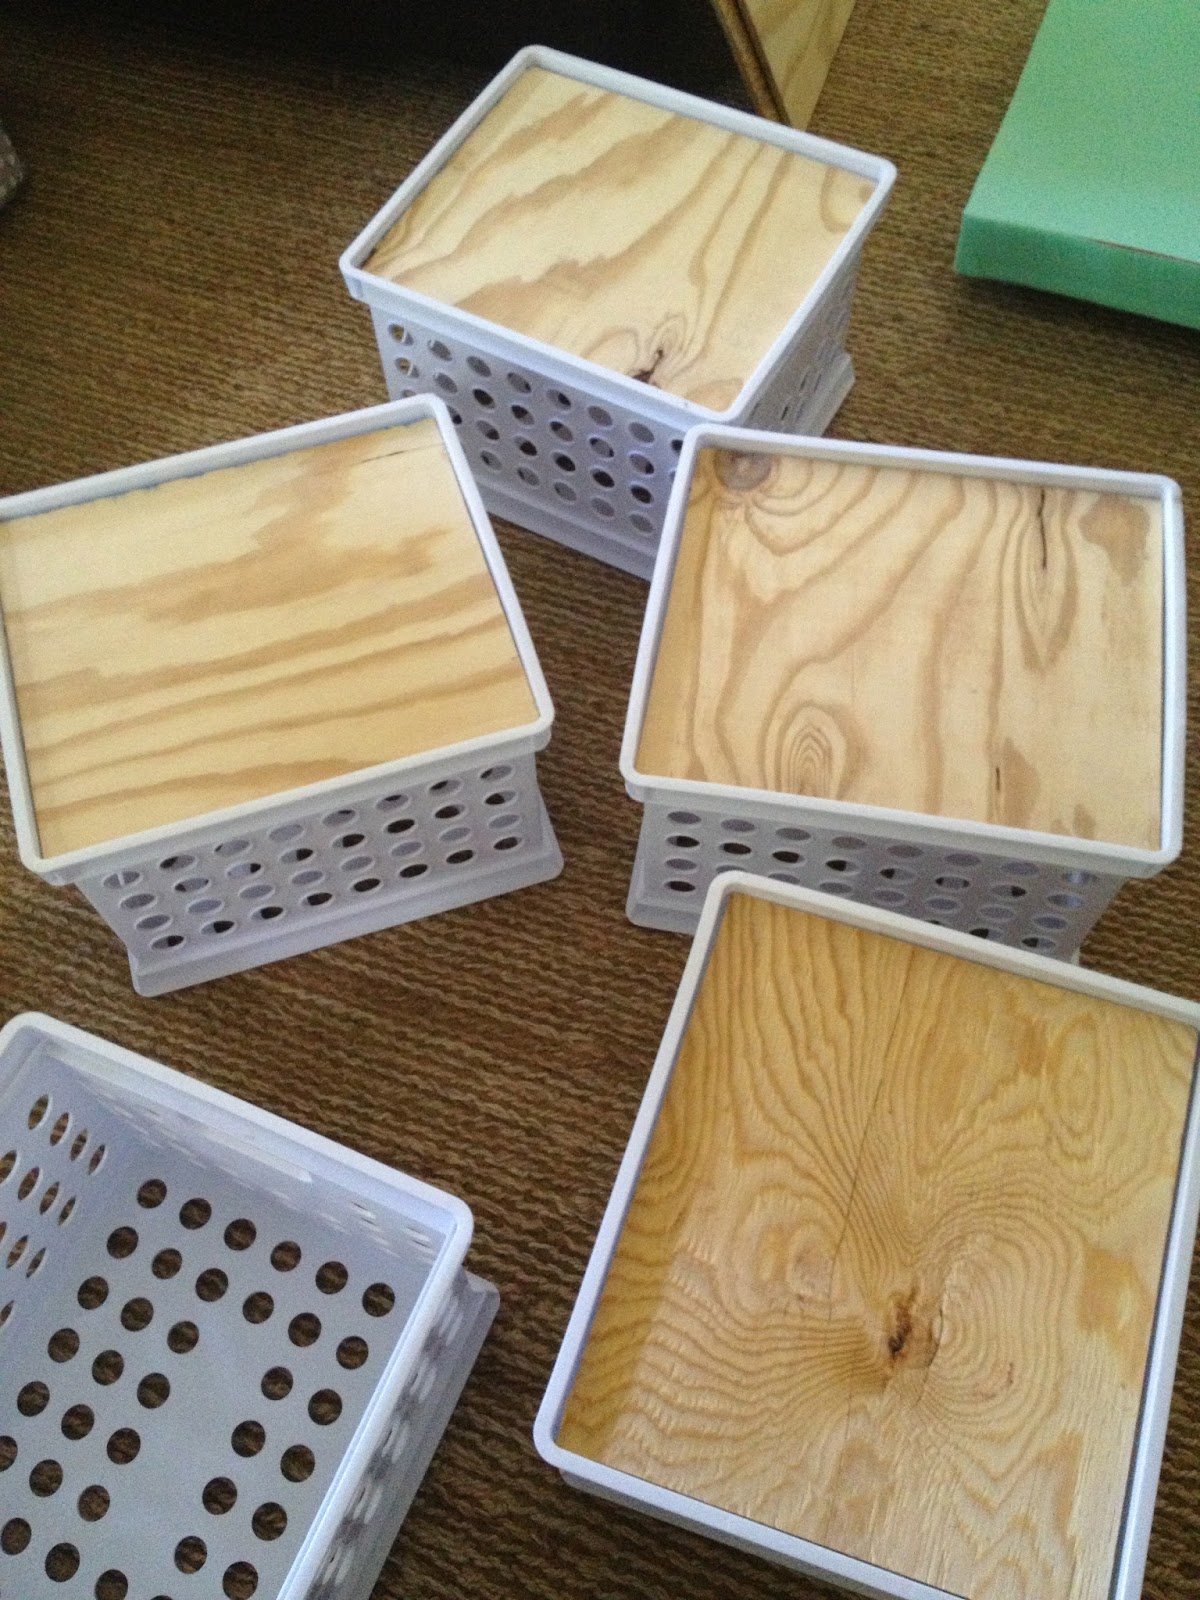
- Sterlite crates (I got them at Target with the dorm stuff…they are sturdy. They need to have the little lip on them for files so that the cushion can rest on it. Some of the cheaper ones I have seen did not seem strong enough to use for a seat).
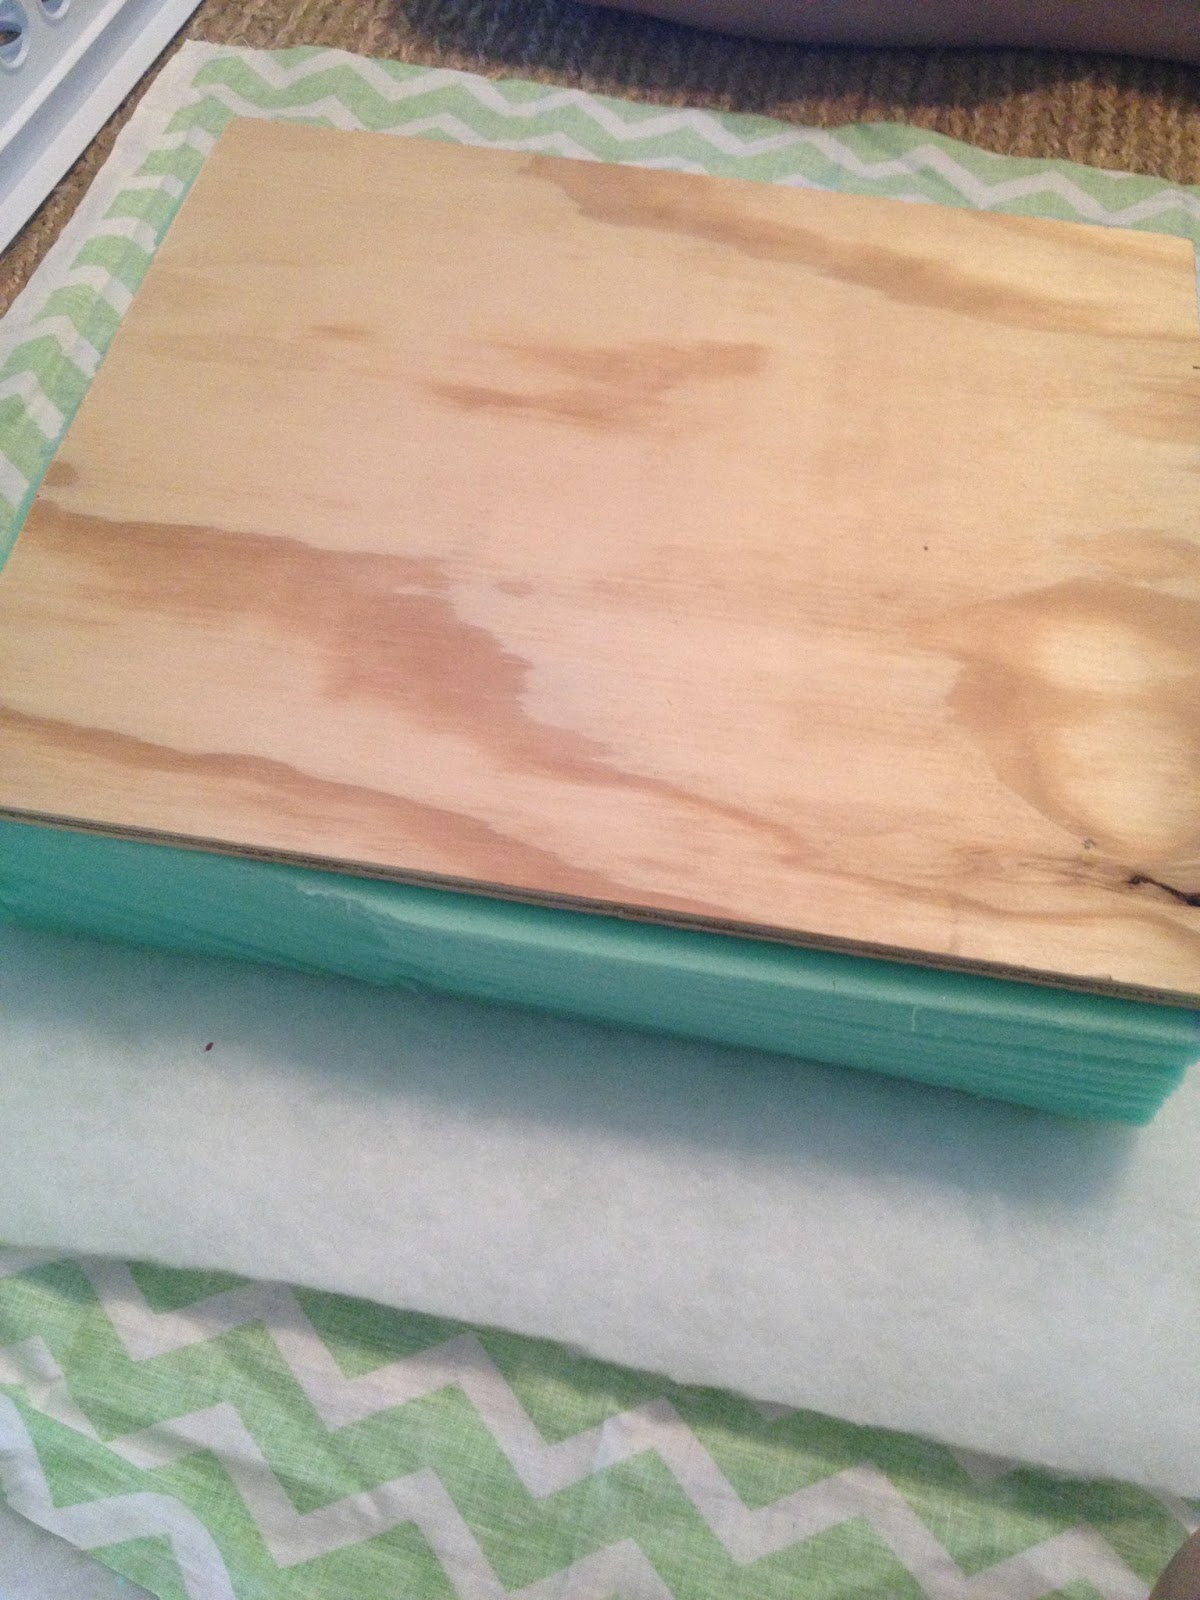
- Cushion foam from Joann’s (I used the 2-3 inch foam which was waaay more expensive than others. I definitely could have done a thinner foam, but I also had some sensory needs in mind. The thicker cushion has a good little squish and will be comfortable for the kids.
- 4 x 8 plywood from Home Depot (they will cut them to size for you if you bring a crate with you)
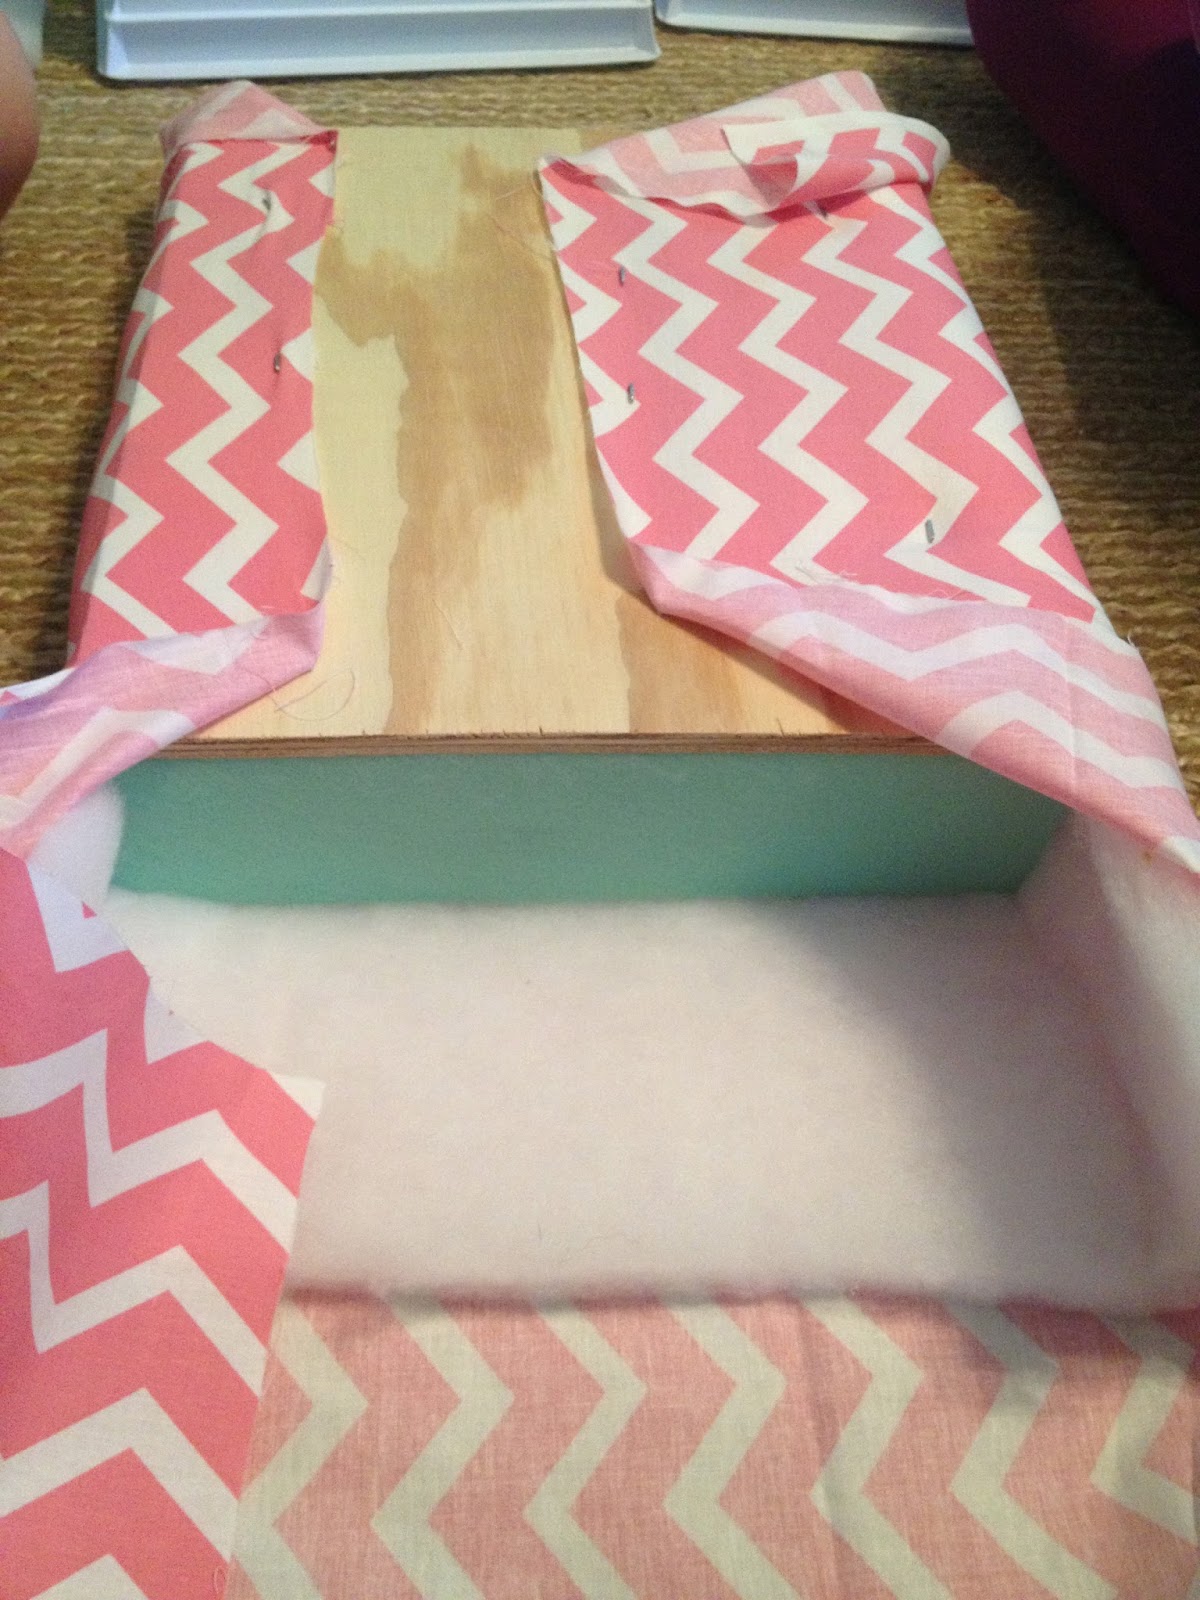
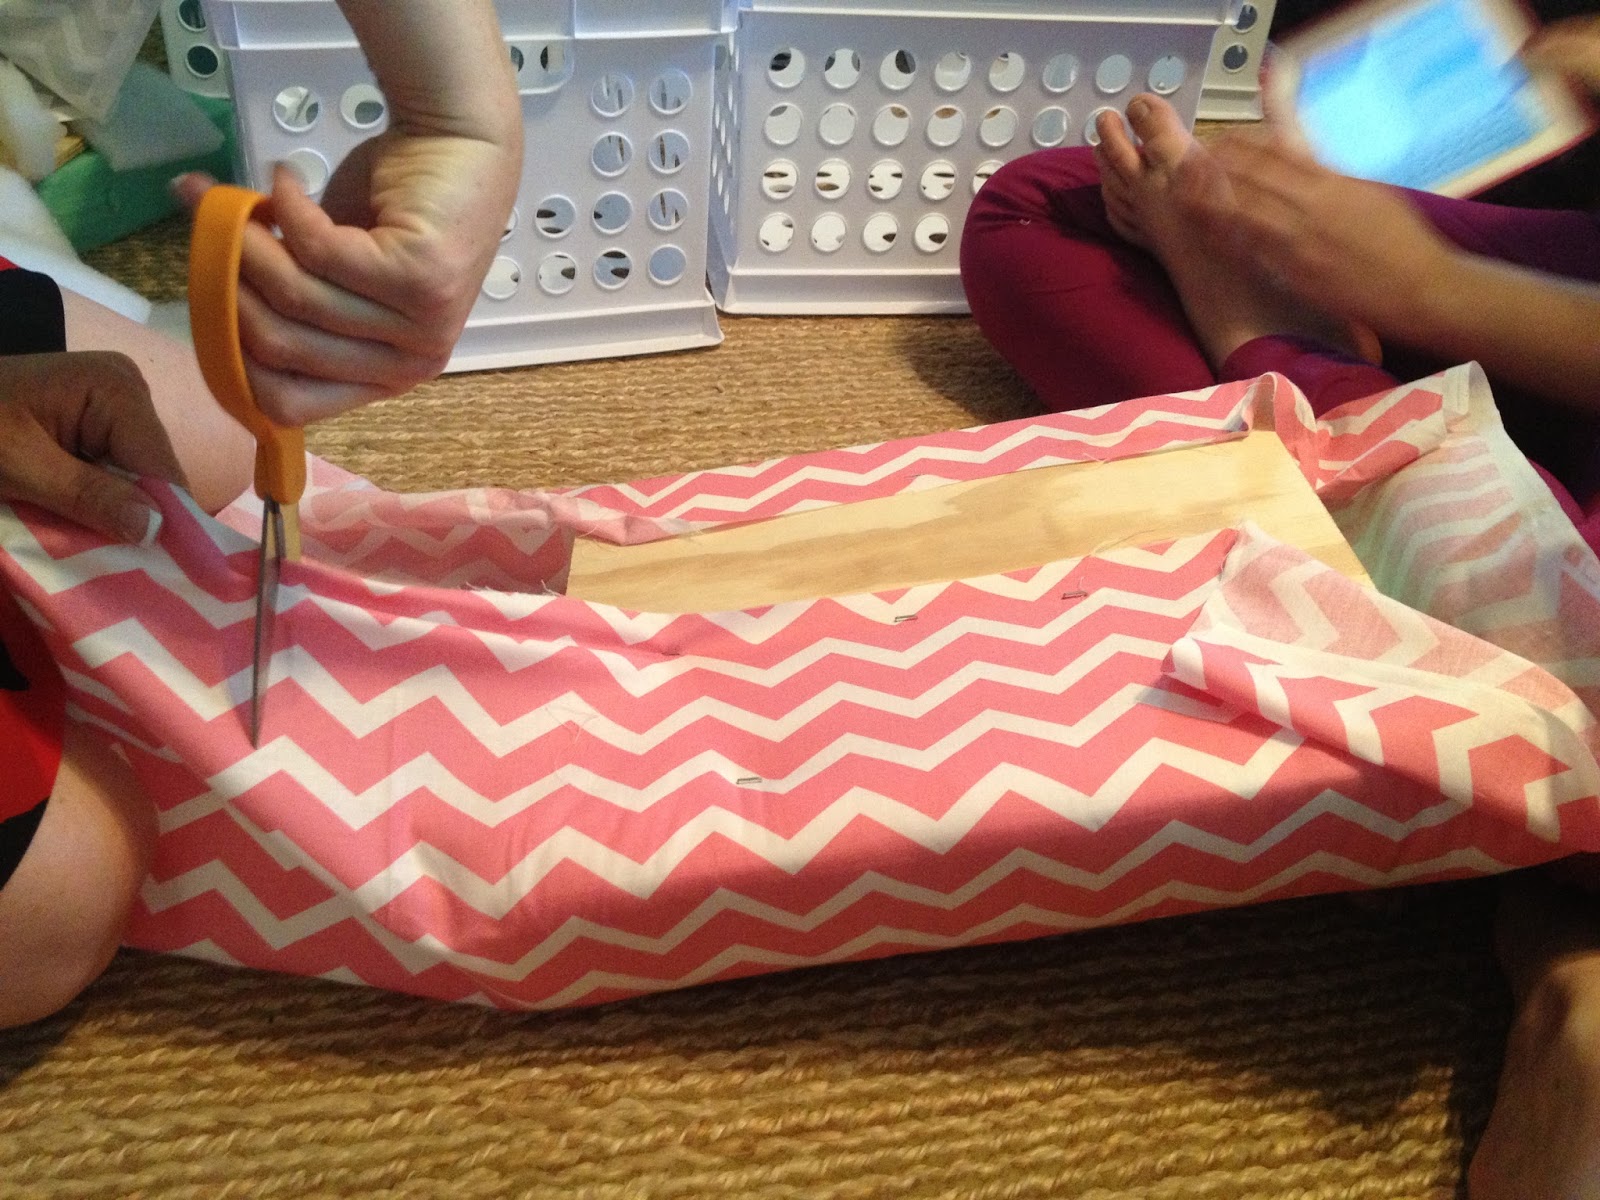
- Batting foam (optional) I got the batting foam because the color of my fabric had a lot of white in it so I was afraid the green foam would show through. The foam is nice because is does give it a smoother, rounder finish on the cushion corners and it makes them even more comfortable.
- Fabric!


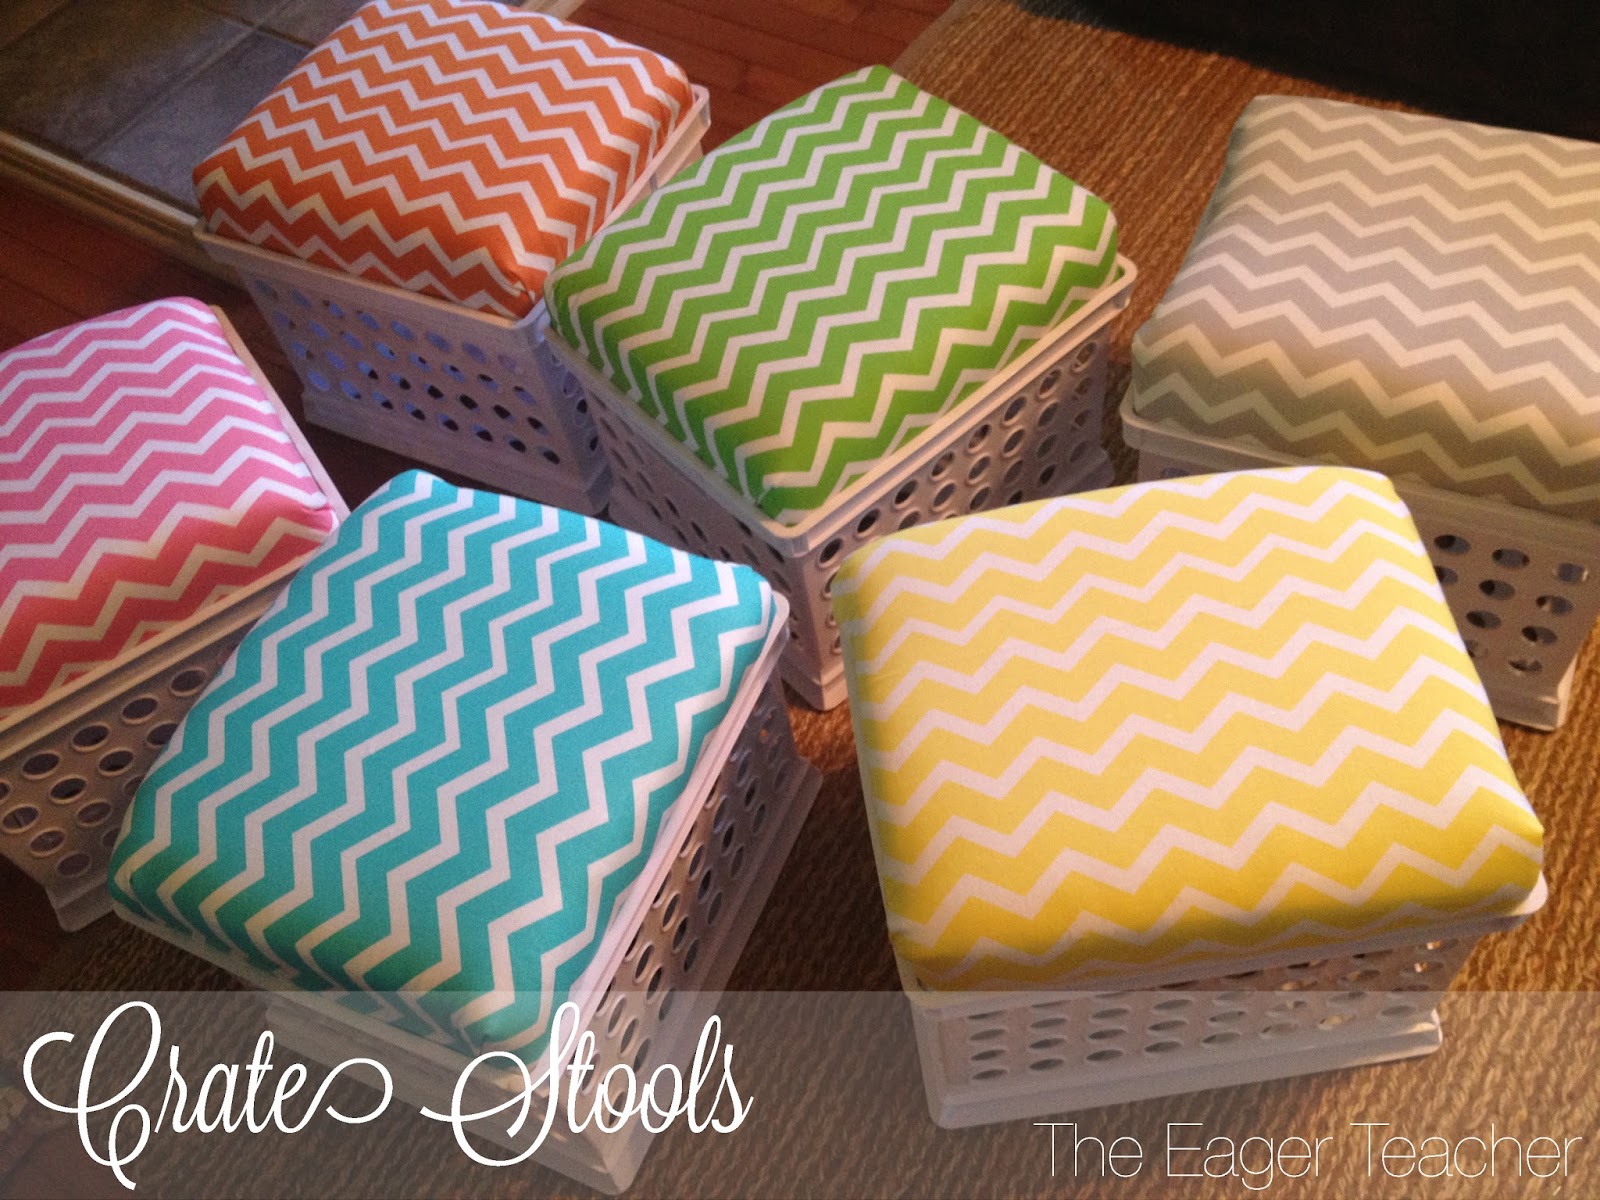
Voila! I am so excited about these. Some people use them for storage underneath and include a little tab on the side so they can easily pry the cushion up. Since my kiddos are easily distracted, I am going to opt out of the bonus storage and just use them for little chairs.


Those turned out so cute! Your kids are going to love them 🙂
WOW… I'll take 16! Smiles and stop by anytime!
So cute, I love chevron!!
I will be making these! Thanks for the great instructions and pictures!
These are adorable!
They came out beautifully! And you made it look so easy!
Wow those are awesome nice job.
These are so darn cute 🙂 I was wondering if you had any other ideas for the base that would fit in more with a livingroom for extra last minute seating. This look is great for the kids room or my outdoors 🙂 Can you help me with something for my livingroom??
The only thing I can really think of is maybe using something a little rustic looking as the base, like a wooden milk crate or something like that? Then it doesn't look so classroom/kid style. Good luck! 🙂
I've done it with an antique wood crate used to ship whiskey. Cut a board to the exact size of the top and another one 1/4" smaller (on all 4 sides) then the inside dimensions. Center the smaller board on bottom side of the top board and either glue, nail, or screw it on. This will fit just on the inside lip to keep it from slipping off the top. Because this one sits on the top (instead of inside like the milk crate) it is easily lifted off if you'd like to put things in it (i.e. books, magazines, knitting, etc.) inside it. I don't know if they still use something like that to ship alcohol, but you could ask around or possibly ask the grocery stores if they receive produce in wood crates. Another idea (which is my next victim) is the faux leather covered storage boxes you can get at craft stores like Hobby Lobby and some of the office supply stores. I can't believe I've never thought of doing it with the milk crates…what great idea!
I am totally going to try this for my kinders next year!! I can use them around the room for our Daily 5 rotations. Thank you so much for sharing such an awesome idea, I love it!!
http://www.kinderdragons.blogspot.com
I'm so happy that you are going to try them! My kids loved them this year and I used them as a reward. So if they were being good, I would let them "upgrade" to a stool to complete their work on. 🙂
How much fabric was needed for each crate?
Hi Sarah! I think I used 3' x 3' squares for each one. The thicker the foam that you get, the more fabric you will need to really cover the whole thing. I got the thickest foam at Joann Fabrics, but I have some friends who used thinner foam and didn't use as much fabric. I hope you have fun making them!
Where did you find the best pricing on chevron fabric? And did you use a heavy weight or just a light cotton fabric?
How do you keep these clean?
I made these, but I put a piece of clear vinyl on top of my fabric so that all I would have to do is wipe them down if they got dirty. 🙂
Any idea how much weight they could hold? I teach 8th graders and would love to use these…
I used a glue gun instead of a stapler and it worked out great!
These would be adorable ottomans for a dorm room….hmmmm… I have a daughter going off to college next year. I might have to make a few of these 🙂
These look great and with the picture tutorial so easy! A couple hints – when stapling the underside, alternate the angle of the staples so that the fabric won't be stressed (horizontal/vertical) so much in one direction. Also, Joann's usually has coupons (download their app) and great sales on fabric. I picked up some upholstery fabric in the sale bin for $7.00 a yard and because it was almost the end of the bolt, I bought the 1/4 yard remaining at the remnant price. Plus I used my 50% coupon for the foam – boom! Enough fabric for the bench I was covering AND stools!
Love this. Thank you for sharing I think this will work with second graders too.
Love this. Thank you for sharing I think this will work with second graders too.
These are amazing!
I am playing on making a couple of these for my daughters new k classroom. In Chevron as well to match curtains, covers etc. I am planning on spraying them with a stain repellent so that they will last longer. I am wondering if there might be a lighter choice than plywood- it is so expensive. They have the material at Walmart inexpensive and I plan on going to JoAnns for the foam. Thank You for the idea! No room in my classroom –
This is amazing! Thank you for the idea and the step by step tutorial and pics! I am completing this project tonight for my1st graders 🙂
The black crates have a "lip" on all 4 sides and the colored ones don't, just on 2 sides. Will they be sturdy enough to sit on for 2nd graders
I made these last year and they were a hit! They were bright and colorful and I used a shower curtain silky material to cover them. Easy to wash off small little stains. Kids loved them and I moved them around as needed. The only problem is that over the whole year they did get dirty with the constant use!, and I now wished I had attached some removable attachment to the material so I could take them off and wash them. Working on a bench now and maybe I will add velcro for the attachment.
What dimensions would you suggest getting the wood cut into? Thanks!